How to install a linear drain. What is a linear drain? This solution, which lets you install a shower unit without using a shower tray, is becoming more and more popular. A shower with a linear drain provides comfort, convenience, and adds a modern finish to your bathroom. But how can you install such a drain? Read on and find out.
How to install a linear drain. What is a linear drain? This solution, which lets you install a shower unit without using a shower tray, is becoming more and more popular. A shower with a linear drain provides comfort, convenience, and adds a modern finish to your bathroom. But how can you install such a drain? Read on and find out.
What is a linear shower drain?
Linear drains are a popular element in many modern bathrooms. They ensure quick drainage of water in the shower area, without installing shower trays or basins. The installation of a linear drain is possible in any place with access to the plumbing system.
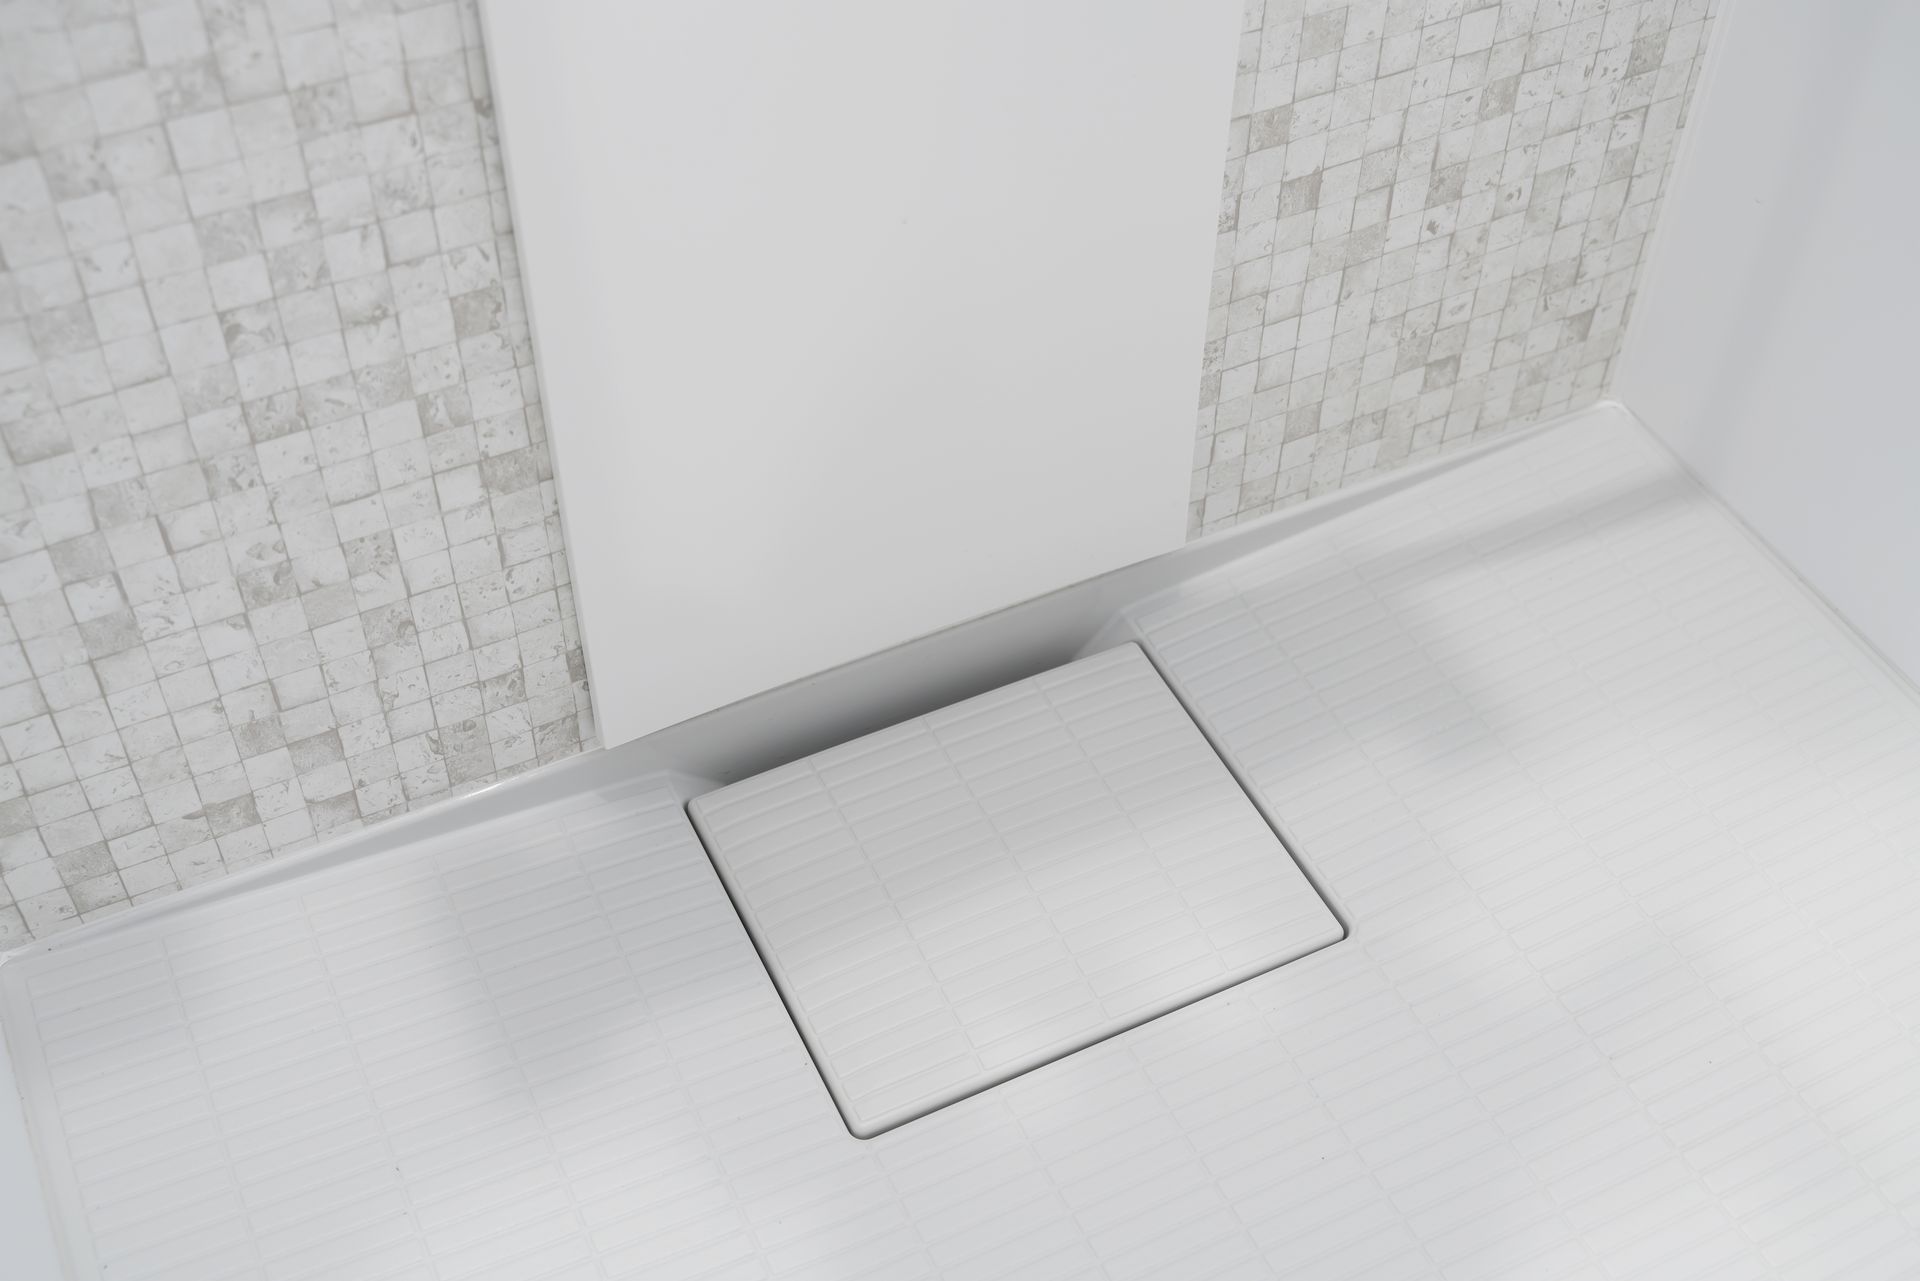
In most cases, bathroom linear drains can be purchased in sets, which also include siphons and all necessary assembly elements. Some sets also come with several drain grates, letting you decide about the visual appearance of your linear drain. Apart from an attractive design, linear drain grates are also highly practical.
By choosing the density of the grate you can control how much hair or animal fur will flow into the drainage system. High-density grates will help prevent the drainage system from clogging, as this is where most of the hair will finally end up. Regular cleaning should therefore be enough. Low-density grates are a great solution if you want to ensure faster water drainage.
An important aspect to consider when planning the installation a linear drain in your shower is how easy it will be to later remove and install the grate. The is important as it concerns the hygiene and cleanliness of your shower. Regular, thorough cleaning of the drain will be impossible without a removable grate, and the easier it is to disassemble and assemble, the easier routine cleaning will be.

Pros and cons of linear shower drains
Linear drains let you install a shower without using a shower tray. For this reason an undeniable advantage of such a solution is the ease of use of the shower. It is also a great solution for showers used by the elderly and children, due to the lack of high edges to climb over. Another advantage is that its design optically increases the size of your bathroom. It also makes it easier to keep it clean.
As with any solution, linear drains also have their disadvantages. The most significant one is that this type of plumbing installation should be planned already at the design stage of your bathroom. Installation is tricky and requires proper waterproofing of both the floor and the walls adjacent to your shower.
Types of linear bathroom drains
Linear drains can be designated for different types of floors. This is due to an element called the mask, which is the external finish of the drain. You will find different coloured grates that match bathroom tiles, terracotta and wood. The grates can also be decorated with various patterns, making it easy to match them to the design of your bathroom.
As for the size, the most standard length is 80 cm. However, both low and high drains are available. You will also find slim versions, as well as linear wall drains – mounted not on the floor, but at the very bottom of the wall, just above the floor. This is a popular solution with some bathroom designs.
Installing a linear shower drain
Now that you have the theoretical knowledge, let’s move on to how to install a linear drain. To begin with, you will need to determine what type of flooring you have in your bathroom, in order to choose the right method of assembly. If on the ground floor, you should first install the sewer connection and then pour the concrete, followed by the installation of a siphon. The last step will be laying the screed.
In the case of a beam and block floor, the sewage connection is installed in the ceiling during construction. This creates a gutter to which the connection elements will be fitted. The depth of the gutter should perfectly align the upper edge of the ceiling with the upper edge of the siphon. The hollow brick channels, located between the beams and blocks, will be perfect for laying out the piping.
In the case of a reinforced concrete floor, where the ceiling is not thick enough to fit the entire system – including the siphons and pipes – you can fit the sewage connection under the ceiling and cover it with tiles.
The next step is assembling the elements of the linear drain. Remember that the drain must be above the connection to the sewage pipes, and that the grate should be approximately 1 to 2 mm below the level of the tiles. The drain itself can be installed on the floor or on the wall, but regardless of the variant you choose it is best to locate it as close to the shower panel as possible.
Another important aspect to remember is the water drop necessary to drain the shower area. There are two types of drainage, and their use is specified in the documentation provided by the manufacturer, where you will also find out about the type of drop that should be used. In the case of linear drainage, a 2.5% gradient should be selected on one or both sides, depending on the direction of the drain.
In the case of point drainage, the floor will need to be sloped from each side. The drop should be 1.5%, and the shape will resemble that of an envelope.
When the floor is hardened you can start preparing the insulation. Sealing tape will be needed for the siphon. The walls and floor can be waterproofed using a liquid film. The process is very simple, using an ordinary paintbrush or roller. The film should be applied to the entire floor and walls to a height of not less than 1.5 m. The corners of the shower area without a shower tray should be sealed using insulation tape.
The final step of installing a shower drain is tiling. We recommend that you start from the side with the drainage, taking into account the surface level and slopes.. Smaller tiles, which will not need to be cut around the drainage, will be better in this regard. It is also very important to that the grouting is done properly. Epoxy grouts are best, as they seal better and are more durable.
How to install a linear shower drain – summary
If you are wondering how to install a linear drain in your bathroom, bear in mind that this can sometimes be quite a tricky process. If you want to install a shower without a shower tray, you will very likely have to renovate the entire bathroom. Therefore, it is better the plan the installation of a linear drain in your bathroom at the design stage.
Before start preparing to install such a drain, make sure you are aware of the pros and cons of this type of solution.
Read our next article if you’d like to find out how to design a small bathroom.


Share